

An extensive search of my area and trips to 5 different beauty supply stores ended with my having to order nail striping tape on Amazon. Hence, it took awhile to get here, and then, since the instant motivation was gone, it’s taken me awhile to get around to using it. But now, I’m SO glad I have!
I started out my doing a little research. I’ve heard both rules of thumb when it comes to using tape of any kind in manicures – peel it off immediately and wait for the polish to dry. So after watching a couple of YouTube videos that, also, advised two different techniques, I decided to leave the striping tape on a bit since peeling tape off immediately in the past has not worked out well for me.
Sinful Colors “I Love You” with Hedy’s man.ish.ma “Space Silver” underneath
After looking for some unique color combinations online, I abandoned that idea and decided to go with one of my favorite standards – silver and purple. I picked out a silver sparkly polish I picked up last Christmas at the drug store, some relatively generic brand called Hedy’s ma.nish.ma in “Space Silver”. This polish claimed to be a “holographic nail color”, and was only $2.00 so I picked up two at the time – which was a little bit of a let down since neither gave me the truly holographic look I desired.
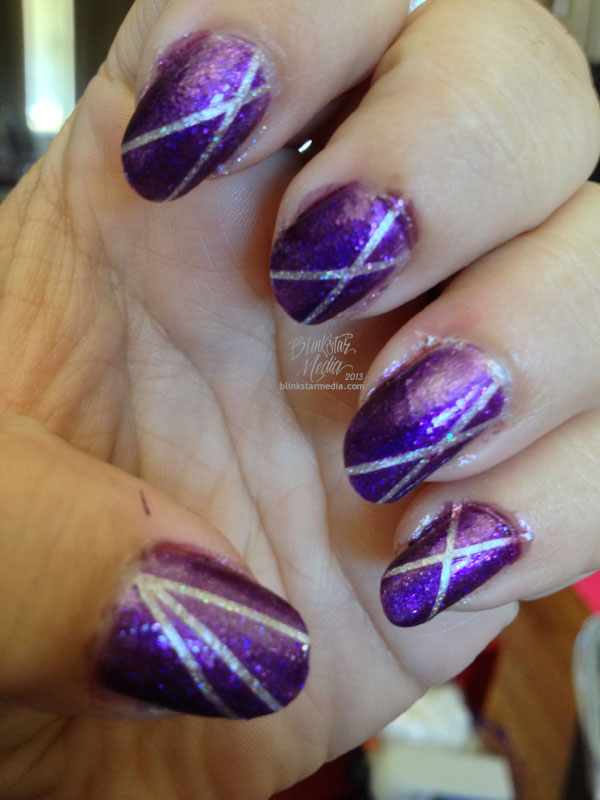
I digress… I made the wise decision to put the base color on the night before busting out the striping tape for the finished manicure. The top color I decided on was from Sinful Colors called “I Love You”, a sparkly purple. Despite how dark it looks in the bottle, it did require 3 coats to get a good color saturation. I decided not to try too hard with matching the striping tape up exactly the same on each nail – for my first time, I’d go for more of a random look just in case I messed it up, it wouldn’t bother me so much! So I placed the tape on one hand, did the top coats, and waited for the polish to dry for about 10 minutes before peeling it up. And voila!
Only one came out a bit wonky, and I bet you can’t even tell which it is! This picture was taken before I cleaned up the excess polish on the sides. I found a set of brushes that works well for dipping in acetone and cleaning up – some slightly stiffer pig hair brushes from Daiso Japan that work way better than the synthetic nylon brush I spent much more money on from Sally Beauty.
I started with my left hand first, since I’m right handed, and moved on to my right hand. I decided for a slight change to use the striping tape as its actually intended on my thumb, since I did grab the pinkish-purple striping tape to use. I’m glad I looked at the YouTube videos before hand as they all suggested a quick-drying top coat, so I used the Seche Vite Dry Fast Top Nail Coat I picked up on sale awhile back. I’m loving the look, especially with the one accent nail!
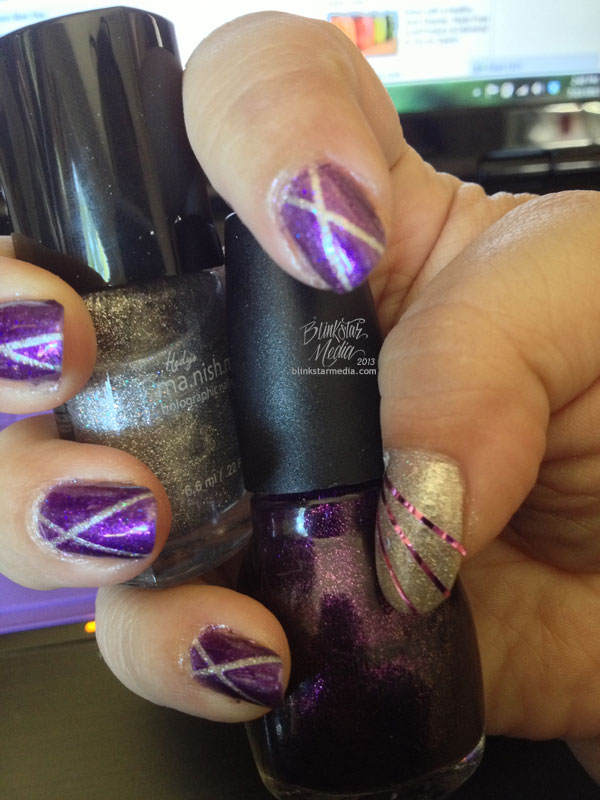
Hedy’s ma.nish.ma in “Space Silver” under Sinful Colors’ “I Love You”
The striping tape was super easy to use, especially since I wasn’t necessarily worried about precision in this case. The only precision I did use was on my thumbs to make sure the “origin point” lined up. It was a bit difficult on my one accent thumb to cut the striping tape so that it was flush with the edge of my cuticle and nail, but I think that was more due to the sharpness of my cuticle clippers I used and not so much the tape itself.
Overall I’m so happy I did this – it was much easier than I thought it would be and really makes my nails look great. Next up I’ll have to try to dotting tools I bought along with the nail striping tape – a whole new nail art adventure awaits!