

Don’t you just hate it when something hailed as fool-proof is anything but? I first tried the Sally Hansen Salon Effects Real Nail Polish Strips a couple of years ago when they were first introduced. I needed a cute manicure quick while in Oregon for my brother-in-law’s wedding. I went with the Sally Hansen Salon Effects Real Nail Polish Strips in Love Letter, and for my first application it wasn’t terrible, but it wasn’t nearly as easy as they made themselves out to be, either.
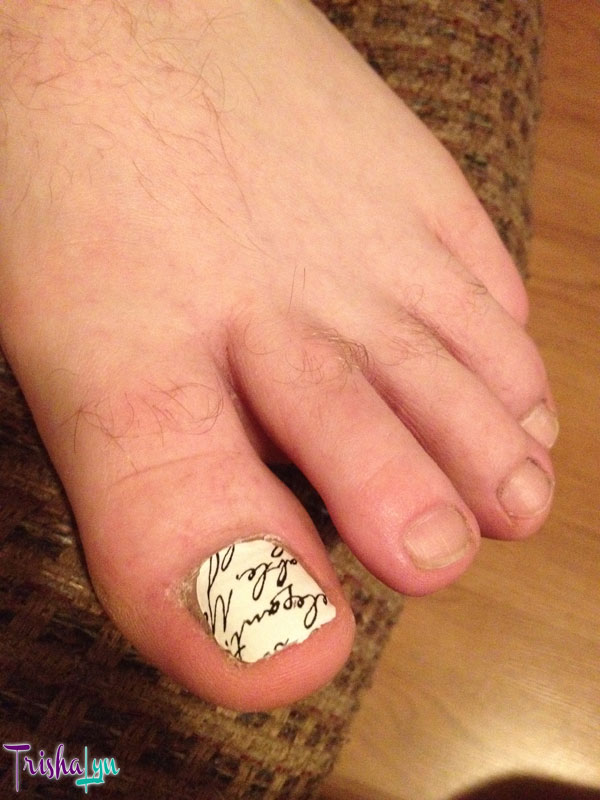 I found that they were easier to apply to someone else’s nail and not so much my own, as you can see where were Dominic let me put a spare on his big toe cause he’s a good sport! Since then, I have bought some more nail strips, but haven’t used them that often. I used some around Halloween and have tried the gel strips too. The strips are lauded as being easier than nail polish, but I always found that I wasn’t as happy with the results as I would be with just painting my nails.
A while back, when heading north for my Petaluma wine production tour, I was scurrying around to get my work done and everything packed for the next couple of days, and totally ran out of time to do my nails. I’d bought some new Limited Edition Salon Effects on clearance at Target, so I tossed one into my bag and decided to attempt it at the hotel that night.
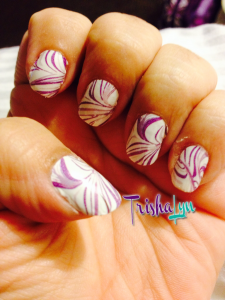 What do you think? This is Sally Hansen Salon Effects Real Nail Polish Strips in Sand Art, which was limited edition this summer. I’d say this ain’t bad considering I did it in a hotel room while watching a marathon of Extreme Couponing. I’m glad I took off my existing polish and such at home earlier in the day since I literally only had the strips, an emery board I keep in my travel toiletries bag, and the travel nail scissors in the kit I carry in my purse. The Limited Edition strips don’t come with the little nail file and orange stick that the normal ones come with.
This became a fortuitous discovery, though. I hadn’t used nail scissors in the past to trim them, instead just using the file. I found that the nail scissors made it way easier to get a cleaner edge on my tip, something that bugged me about my past applications. Now I know that relying on the nail file isn’t going to be as good as using the scissors to do a little trim first.
I was so happy with finally feeling like I was getting better at applying these strips that I bought some more that were on the clearance rack at Target at my next trip. I even took the plunge and bought some Jamberry wraps, which I’ll be trying my hand at eventually. Jamberry wraps, or Jams as fans call them, need to be heated slightly with a small heater or hair dryer to apply correctly, so it’s a bit more of an undertaking than my usual manicure that’s often done while I work at my desk. I may even host a Jamberry party if I like them, but more on that later.
Astute readers will remember I also bought some custom Minx wraps from Zazzle that I need to try, and totally will the next time I need to flash my logo around! I also bought a ton of nail stickers at Dollar Tree that might be total crap, but maybe I can make them work better knowing what I know now and having the practice at applying these.
Do you use Sally Hansen Salon Effects Real Nail Polish Strips, Jamberry, Minx, or any other kind of nail wraps? What are your best practices?